There are three Flow workflows to configure the integration with CCH iFirm Practice Manager. They are implemented in reverse order. The following instructions show how to implement and configure Flow #3.
Step |
Instructions |
Screenshot |
|---|---|---|
1 |
Navigate to Flow.
|
 |
2 |
Click My Flows then Import. |
 |
3 |
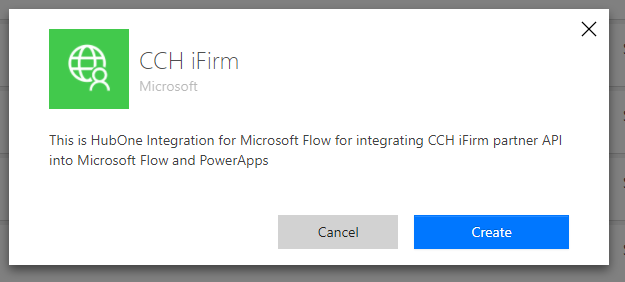
Download Flow #3 here.
Then import the Flow (the zip file). Do not extract the files, simply upload the entire zip.
Please wait while it loads the zip file. |
 |
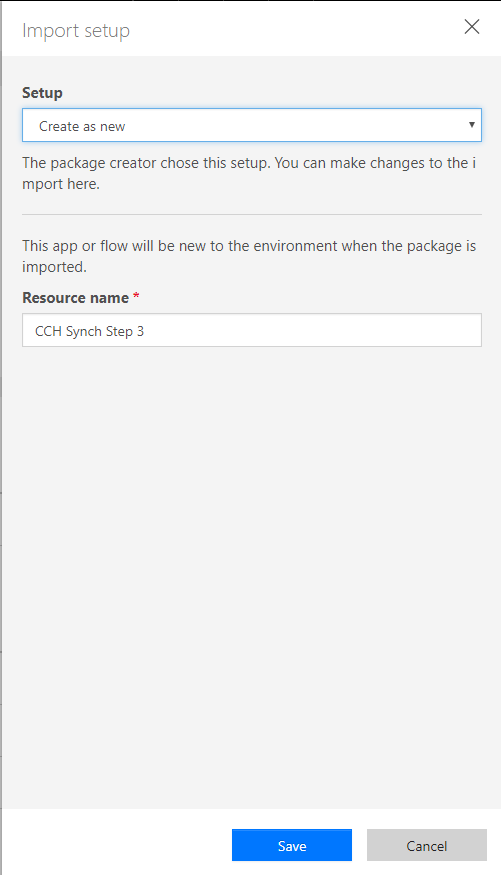
4 |
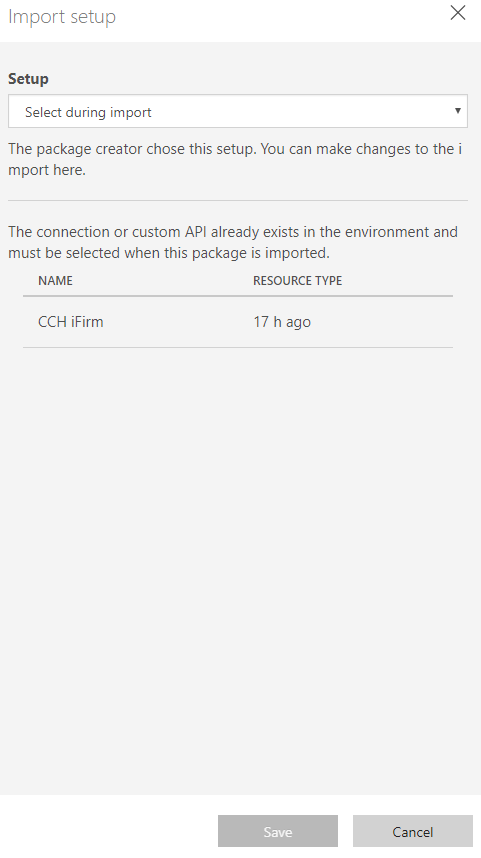
If the CCH Synch Step 3 Import Setup link is Create as new, click on the link and then Save. Then go to step 6.
If the link is Update, click the link. |

OR
 |
5 |
Choose Create as New from the Setup dropdown list, and click Save. |
 |
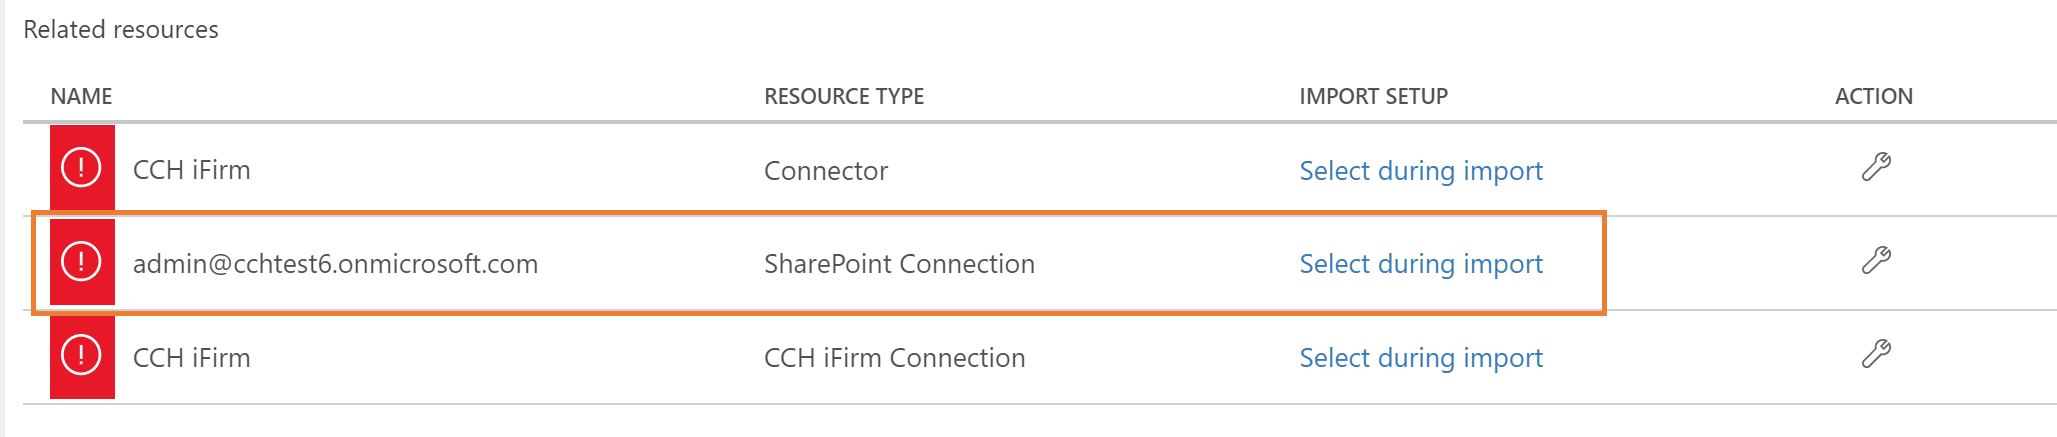
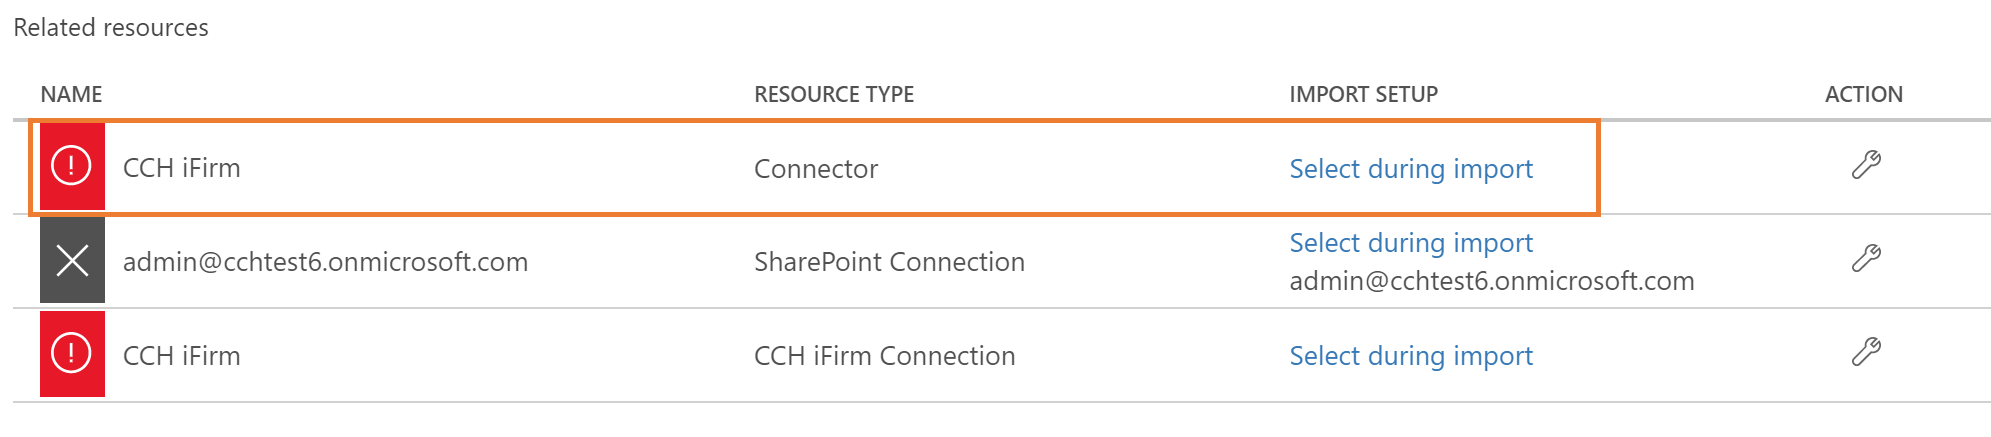
6 |
Select the SharePoint Connection and click Select during import. |
 |
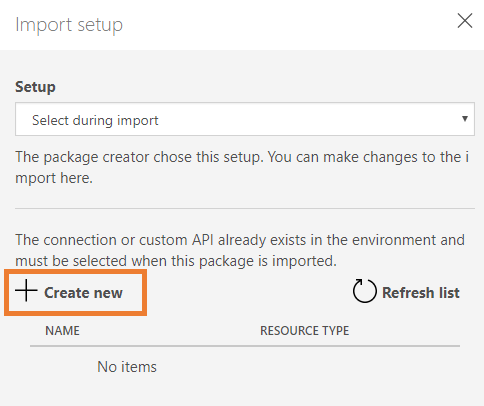
7 |
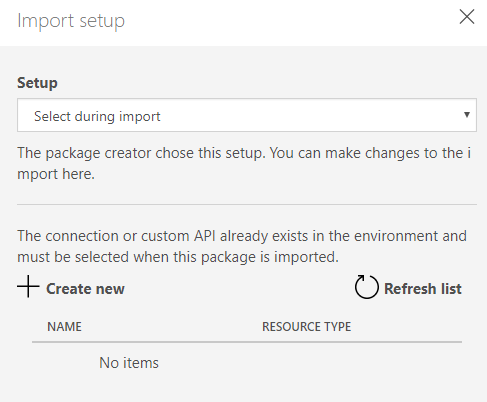
Click + Create new.
This will open a new browser tab or window. |
 |
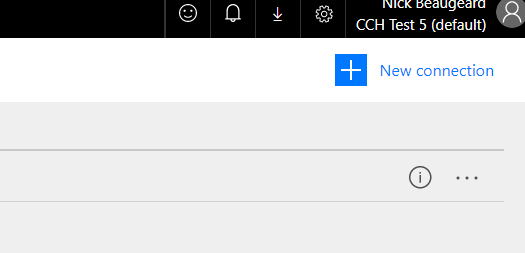
8 |
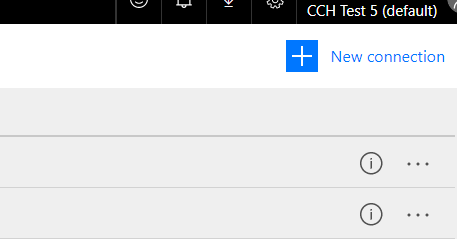
Click New connection. |
 |
9 |
Scroll down and select SharePoint by clicking the + to the right. |
 |
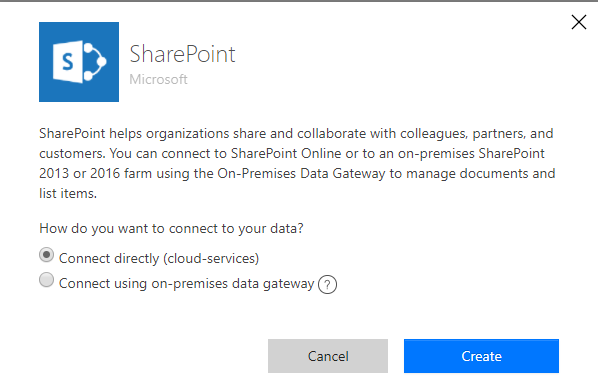
10 |
Leave as Default: Connect directly (cloud-services)
Then click Create. |
 |
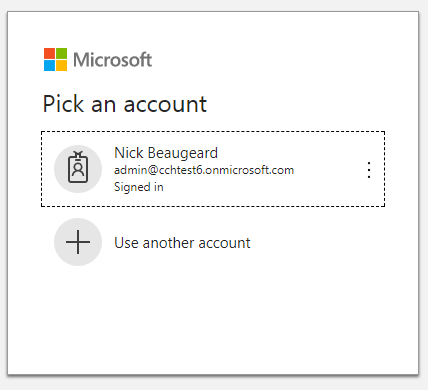
11 |
Sign in using your global admin account. |
 |
12 |
Close that browser tab/window.
Back on the original Flow screen, select the new SharePoint Connection and click Save. |
 |
13 |
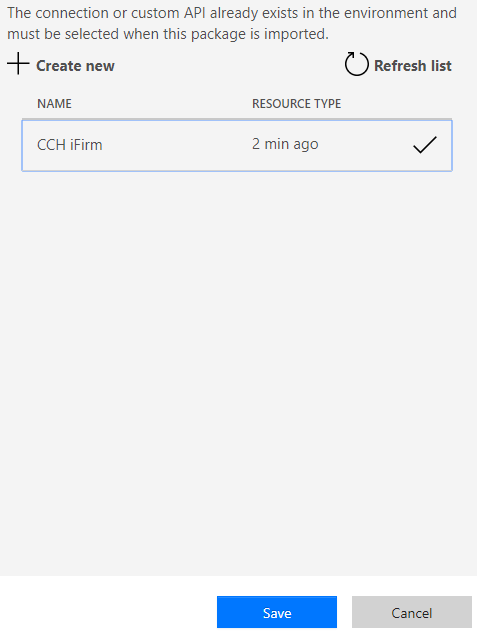
Select the CCH iFirm Connection (Resource Type: Connector) by clicking Select during import. |
 |
14 |
Click CCH iFirm and click Save. |
 |
15 |
Select the bottom connection by clicking Select during import. |
 |
16 |
Click + Create New.
This will open a new browser tab or window. |
 |
17 |
Click New Connection. |
 |
18 |
Scroll down and select CCH iFirm by clicking the + to the right. |
|
19 |
Click Create. |
 |
20 |
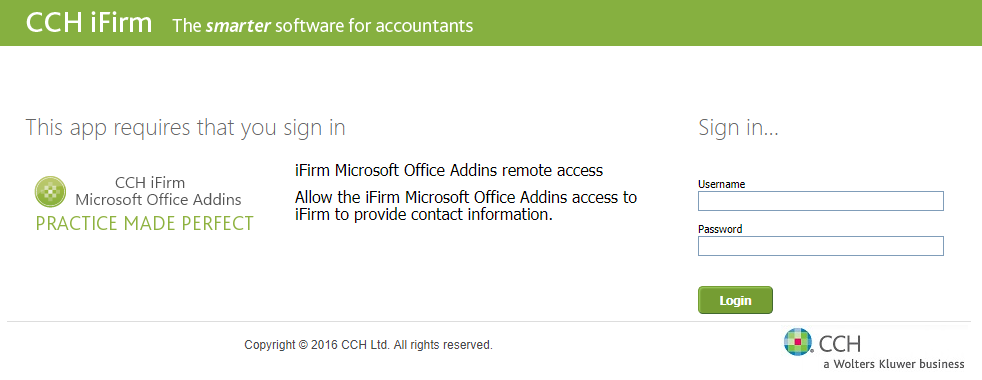
A CCH iFirm pop-up window will open.
Enter your CCH iFirm Username and Password and click Login. |
 |
21 |
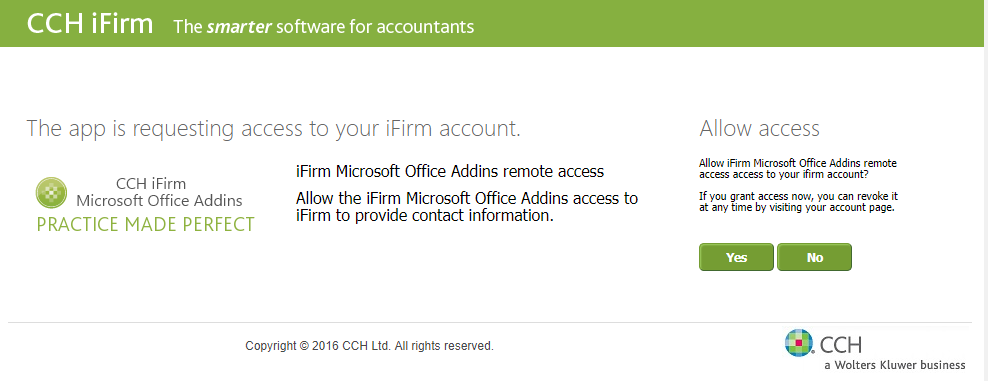
Click Yes to allow access.
The pop-up window will then close automatically. |
 |
22 |
Close the Browser tab showing connections. |
|
23 |
Select CCH iFirm and click Save. |
 |
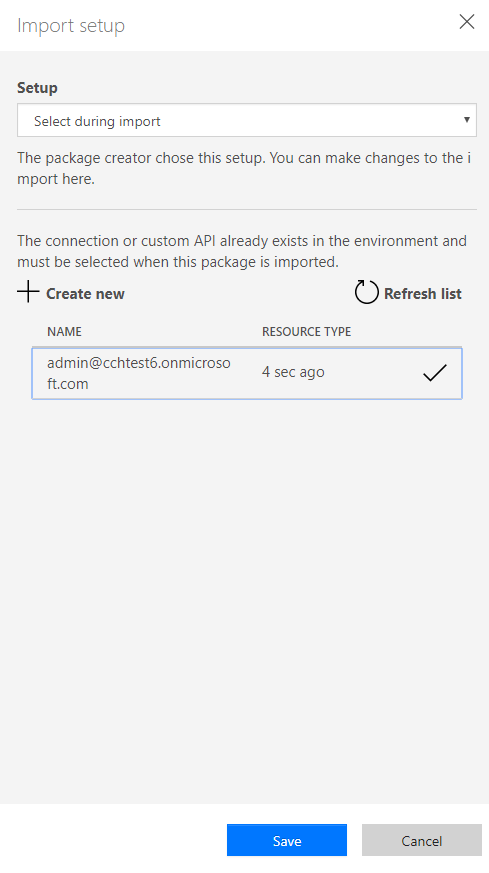
24 |
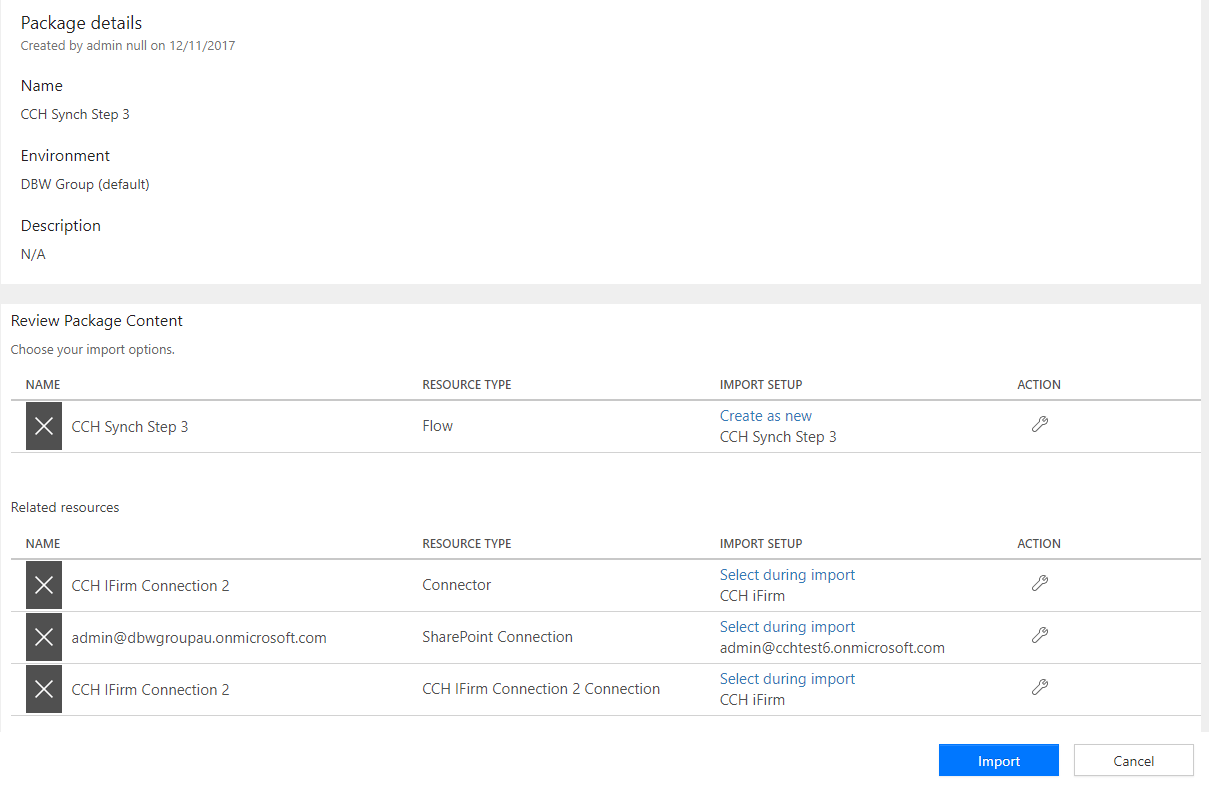
Once your screen looks like the example shown to the right, click Import.
This may take a minute, do not navigate away from the screen or refresh. |
 |
25 |
When the package has been successfully imported, you will see a notification at the top of the page. Click Open Flow. |
 |
26 |
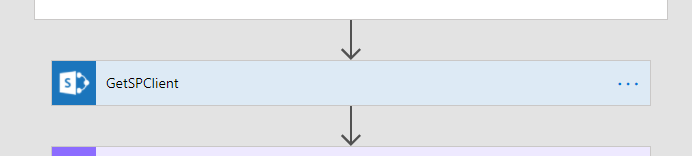
Scroll down to GetSPClient and expand it by clicking on the title. |
 |
27 |
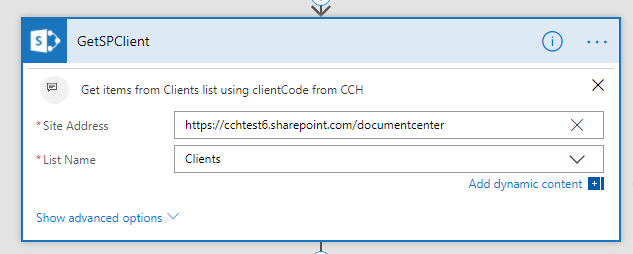
Change the SiteAddress to the address of your Document Center.
Then change the list name to Clients. |
 |
28 |
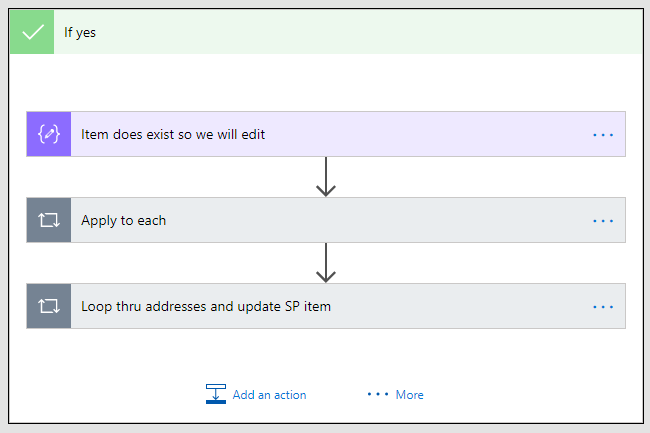
Scroll down to the If Yes box below. |
 |
29 |
Expand Apply to each by clicking on the title. |
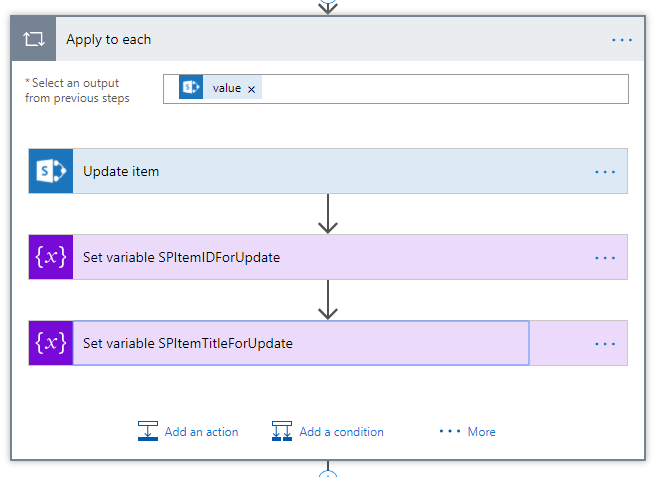 |
30 |
Expand Update Item and change the Site Address to your Document Center URL.
Then change the List Name to Clients. |
 |
31 |
Scroll down to Loop thru addresses and update SP item. |
 |
32 |
Expand Loop thru addresses and update SP item. |
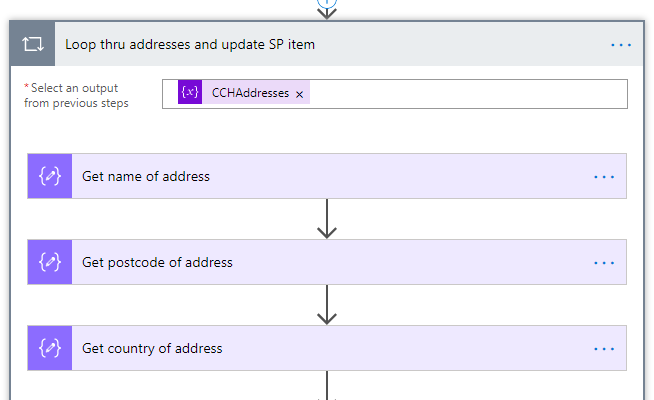 |
33 |
Expand Switch Address Type. |
 |
34 |
Expand Case Postal Address. |
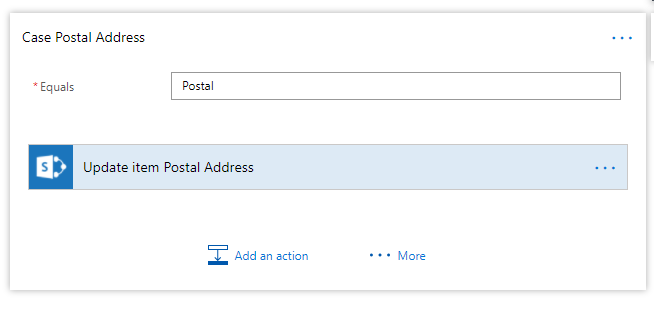 |
35 |
Expand Update item Postal Address and change the site address to your Document Center URL.
Then change the List Name to Clients.
Close the section by clicking on the Update item Postal Address title. |
 |
36 |
Expand Case Physical Address, then expand Update item Physical Address.
Change the site address to your Document Center URL.
Then change the List Name to Clients. |
 |
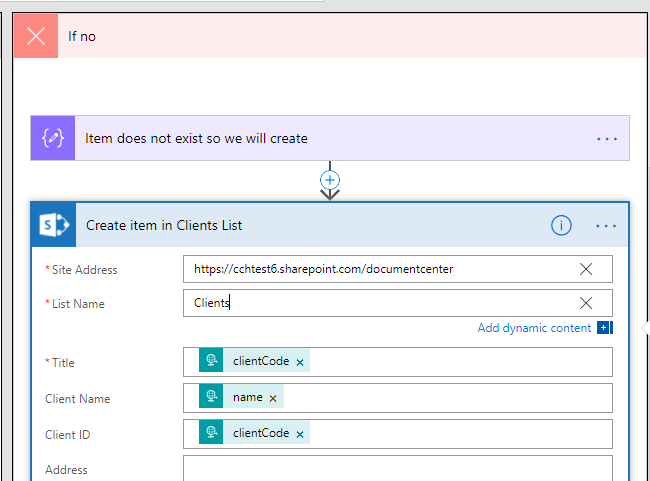
37 |
Scroll back up and across to the right to If no and expand Create Item in Clients List.
Change the site address to your Document Center URL.
Then change the List Name to Clients. |
 |
38 |
Scroll down and expand Loop thru addresses and add. |
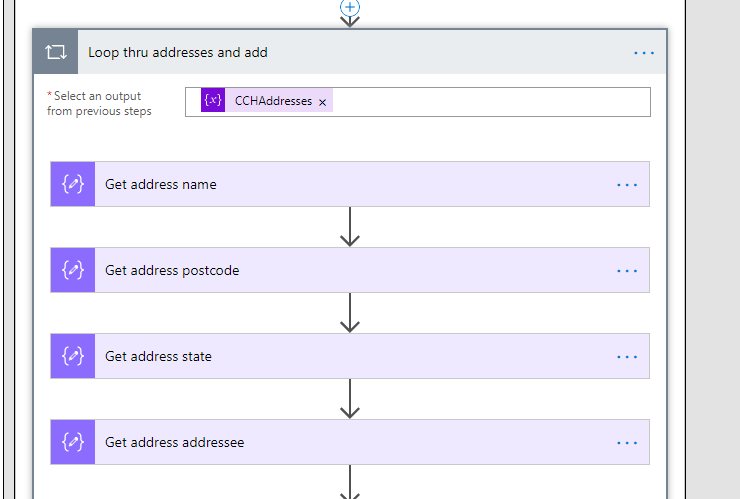 |
39 |
Expand Switch type of address. |
 |
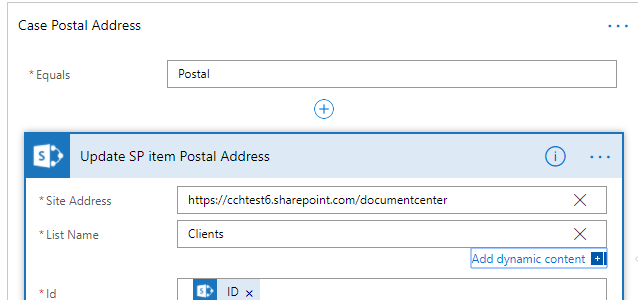
40 |
Expand Case Postal Address and expand Update SP item Postal Address.
Change the site address to your Document Center URL.
Then change the List Name to Clients.
Close the section by clicking on the Case Postal Address title. |
 |
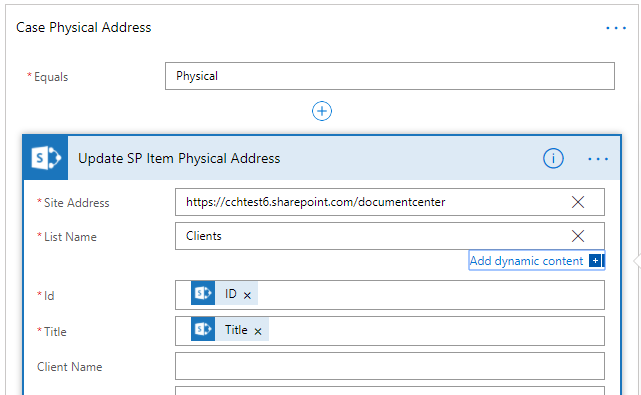
41 |
Expand Case Physical Address and expand Update SP item Physical Address.
Change the site address to your Document Center URL.
Then change the List Name to Clients. |
 |
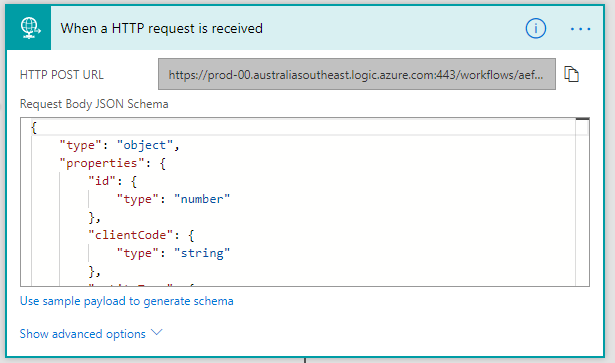
42 |
Scroll to the top and expand When a HTTP request is received.
Copy the HTTP POST URL - you will need this when you come to implement Flow #2.
|
 |
43 |
Click Update Flow. |
 |
44 |
Click Done. |
 |
*** PROCEDURE COMPLETE *** |
||
